We use cookies to make your experience better. To comply with the new e-Privacy directive, we need to ask for your consent to set the cookies. Learn more.
Connecting 3rd Party Devices to a Proteus Sensor
This resource refers to setting up webhooks on 3rd party services such as IFTTT® or your own servers and invoking the webhooks through Proteus Sensor cloud. Webhooks can be useful in initiating specific actions or events on remote servers or connected devices when Proteus sensor status changes from OK to Alarm or vice versa.
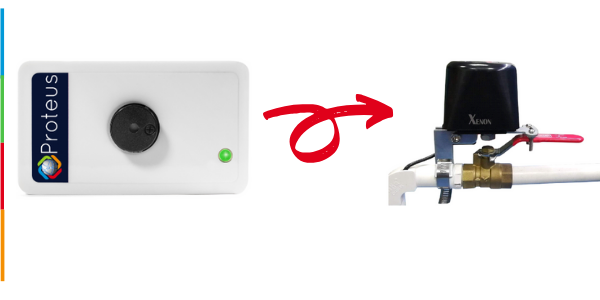
In this example, we will cover the process of turning on or off a commonly available WiFi Water Valve using Smart Life® app based on the alarm and reset conditions of a Proteus AQUO wifi water sensor. The same can be applied to other Proteus sensors (such as a sump pump water level sensor), and also to connect to similar devices other than the water valve model used in this demo.
You can also use this to trigger just a url on your server and continue with any desired set of events.
Notes: Proteus Sensors is not affiliated or associated with IFTTT or any other 3rd party products or services mentioned in this document. IFTTT, Amazon, and any other trademarks are property of their respective owners.
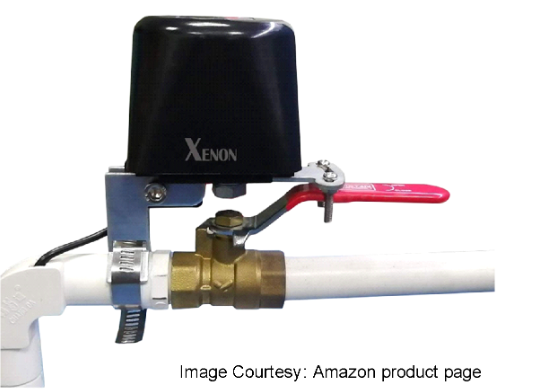
Connecting a Water Valve to a Water Sensor to Turn Water On or Off When a Proteus Sensor is Alarmed
The WiFi water valve we will use for this demo is “Xenon Smart WiFi control Water Valve,Compatible with Alexa and Google Assistant,Application program iOS/Android” available on Amazon.com
Though the setup guide will take you to custom apps based on which manufacturer made the unit, we found that we can connect this sensor to the “Smart Life” app which supports IFTTT. Here are the steps.
1. Download the Smart Life app on your smart phone or tablet.
![]()
2. Login (or create an account) to the app.
3. Click on the + icon to add a device.
![]()
4. Go to Security & Sensors, and click on Sensor (Wi-Fi)
![]()
5. Follow the instructions shown on the screen to reset the sensor, follow the light pattern on the valve and wait for the setup attempt to complete. Unfortunately, the app was not able to detect the valve unit. So we continued with the “Alternate Pairing Mode”
![]()
6. Follow the instructions on screen (all steps). Finally click on the confirm indicator status button.
![]()
7. After finishing the steps, You will get a screen asking you to connect to the SmartLife WiFI network. This is temporary wifi network that comes from the water valve module. Click on “Go to Connect”. If it does not take you to the wifi section of your phone or tablet, then you can manually go Settings > Wi-Fi section of your device. Connect to Smart Life Wi-Fi Network. It is also possible that the wifi network may have different names based on your water valve module. Once connected, you can go back to the Smart Life app to continue with the setup.
![]()
8. Back in the Smart Life App, the setup should continue automatically. Wait for the app to find the device and finish the setup. Finally, you will have the valve added to your device list.
Once the valve is installed in the app, you can click on the app, and try turning it on and off, to make sure it is working as expected.
Setting up an IFTTT applet
If This Then That, also known as IFTTT is a free web-based service to create chains of simple conditional statements, called applets. The intend is to create applets, and connect it with Proteus WiFi Water Sensor. When Proteus detects water (or goes dry after an alarm), these applets will be triggered letting you control the wifi water valve via the cloud. We will cover this in two sections, making an applet and then using the applet/webhook with Proteus Sensors.
A. Make an applet
1. Login to your IFTTT account. If you don’t have an account, you can sign up for one.
![]()
2. Once logged in, click on Your profile picture, and click on “Create” from the drop down menu
![]()
3. Now, click on the “this” button
![]()
4. Type “webhooks” in the search field. When webhooks appear, click on “webhooks”.
![]()
If you are asked to connect webhooks to IFTTT, then click the connect button. Then proceed to next step
![]()
5. On the Choose Trigger page, click on “Receive a web request” trigger.
![]()
6. On the “Complete Trigger Fields” page, enter an Event Name. For this example, we have entered “Turn_water_valve_off” as the event name. If you intend to create another applet which you want to trigger when the water sensor is back to dry state, then you can use something like “Turn_water_valve_on”. Do not use space between words. Write this event name down for reference as we will need it later. Click on “Create trigger” button after that.
![]()
7. Now Click the “that” button
![]()
8. Now, you will be required to choose action service. Start typing the name of the product or service that you would like to connect to your Proteus sensor. In case you want to connect your Samsung Smart Air Conditioner, start typing that and click on it them you see it in the icons below the search box. In this example, we are connecting a Smart Life plug. So, type in “Smart Life”
![]()
9. Now, if you have not already connected your device, you are required to connect your product or service to IFTTT. Click on the “Connect” button.
![]()
10. You will be asked to link your Smart Life Account. If you are trying to link a device other than a Smart Life Plug, for eg: Samsung air conditioner, then you will need to enter the login credentials for your Samsung Account. Since we are using a Smart Life plug in this example, we will enter our username and password for the Smart Life account.
![]()
11. Once logged in successfully, click the “Authorize” Button
![]()
12. After successful authorization, You will be asked to select the action. In this case, we are trying to turn the plug on. So, click on the “Turn on” box. You can select other choices as the case may be depending on what you are trying to achieve.
![]()
13. You will be asked to select the device/ group. If you have multiple Smart Life plugs in your account, you can select a specific plug or a group. Then click “Create action”.
![]()
14. Review and click the finish button.
![]()
You have successfully created your applet now.
![]()
B. Using the applet/ webhook with Proteus
Now that we have successfully created an applet, let’s move on to the second part: Using this webhook with your Proteus sensor.
1. Open a new browser tab and go to https://ifttt.com/maker_webhooks
2. Click on the documentation tab.
![]()
3. You will find your key on this page. A sample page screen shot is shown here. Your key will be different than the one shown in this screen shot.
![]()
4. To trigger the Smart Life socket, we have to make the web url request with the event name we created earlier . To do this, replace the {event} tag (see image above) with the event name you created earlier. We used “Turn_water_valve_off” as our event name. So our webhook url will look like
https://maker.ifttt.com/trigger/Turn_water_valve_off/with/key/casdfew3423dfgwe456gf3E
C. Enabling the webhooks on Proteus Cloud
5. Login to your Proteus cloud account, and click on the settings tab of your sensor. Scroll down to IFTTT section. Copy the above url to the urls on alarm field. You can follow the same steps again, and create another applet with event name “Turn_water_valve_on” that will turn on the water valve when the alarm is reset. Use this applet in the ‘urls on alarm reset’ field of IFTTT section. You can add multiple webhooks in each field, separated by comma. Click “Save Settings” Button at the bottm.
![]()
Your webhooks are ready to be used. When the sensor goes to alarm or back to normal, you will find your Smart Life Plug triggering based on the applets you created.
Questions?
Questions about connecting your sensor to third-party devices and services? Contact us at support@proteussensor.com with your queries and we will get you the information you need right away.