We use cookies to make your experience better. To comply with the new e-Privacy directive, we need to ask for your consent to set the cookies. Learn more.
How to Connect Your Smoke Alarm to a Proteus Sensor to Receive Alerts When Triggered
In this example, we will cover the steps to connect a Kidde® 120V (Hardwired) AC Photoelectric Smoke Alarm with 9V Battery Backup (a popular smoke alarm system available on Amazon.com) to Proteus RC relay contact monitor using Kidde® SM120X Interconnect Accessories Smoke Relay Module and get email and text alerts when the smoke alarm is triggered.
Notes: Proteus Sensors is not affiliated or associated with Kidde® or any other 3rd party products or services mentioned in this document. Kidde, Amazon, IFTTT and any other trademarks are property of their respective owners. Kidde Wiring Images are courtesy setup user guide.
Statutory Warning: Setting up of Kidde® 120V (Hardwired) AC Photoelectric Smoke Alarm with 9V Battery Backup involves handling wiring involving 120V (or 240V as rated by Kidde) AC Line. Proteus strongly recommends the use of a licensed electrician to handle this task to avoid any and potentially fatal injuries the persons involved. This document shall NOT be inferred in anyways as a recommendation from Proteus to take up this setup process as a Do-it-yourself project.
Let’s get started!
Basic Setup for Kidde Smoke Alarm and Proteus Sensor
For the sake of keeping this document simple and easy, we are not covering the setup process for Kidde Smoke Alarm Sensor as well as Proteus RC Sensor. Please follow the setup guides for these sensors and go through the steps as directed in their respective setup guides.
Connecting the SM120X relay module to the Smoke alarm
Proteus RC requires a relay contact that is purely passive with no AC or DC Voltage on the terminals, Based on the setup manual offered by Kidde, here is how you can wire the relay module to the smoke alarm unit
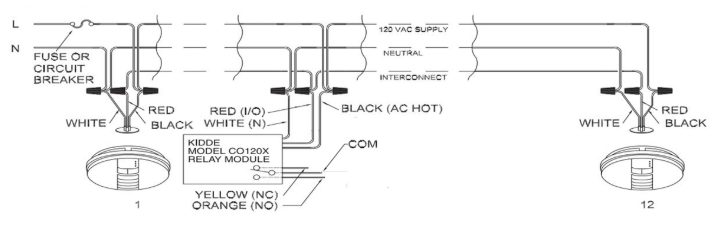
This gives you three wires two of which can be used to connect to Proteus RC.
- Common
- Normally Open (NO)
- Normally Closed (NC)
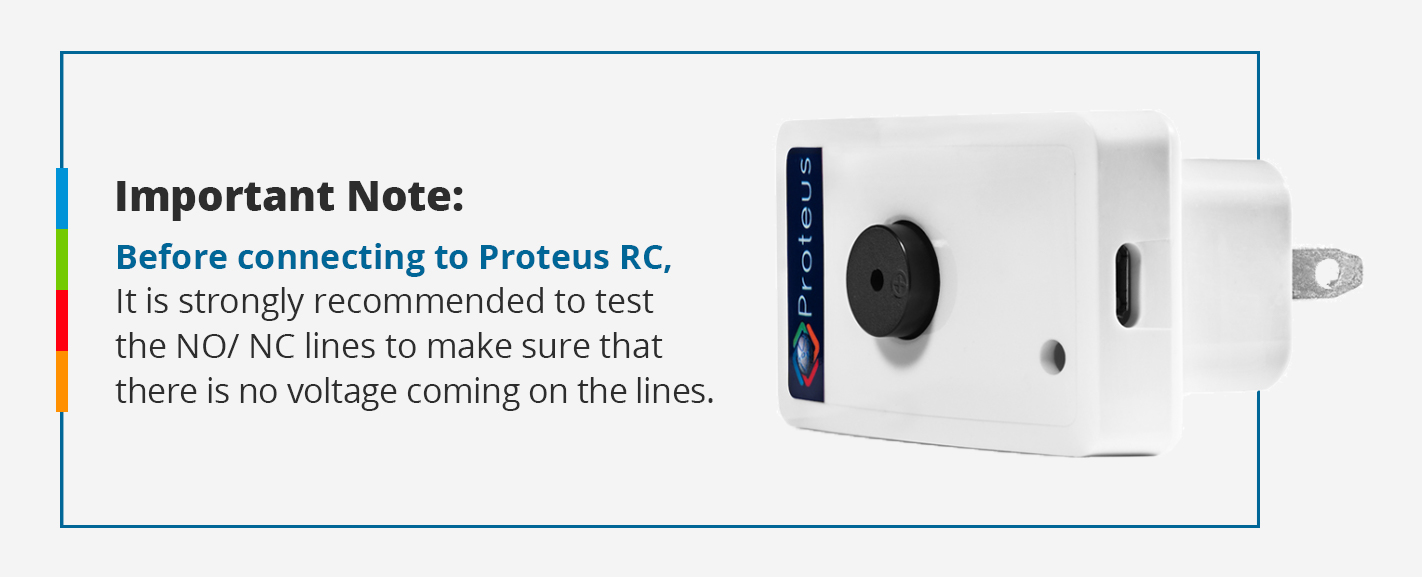
Important Note: Before connecting to Proteus RC, It is strongly recommended to test the NO/ NC lines to make sure that there is no voltage coming on the lines. It is important to have no DC or AC voltages on the contacts for Proteus RC to work.
Here is a picture of our test wiring.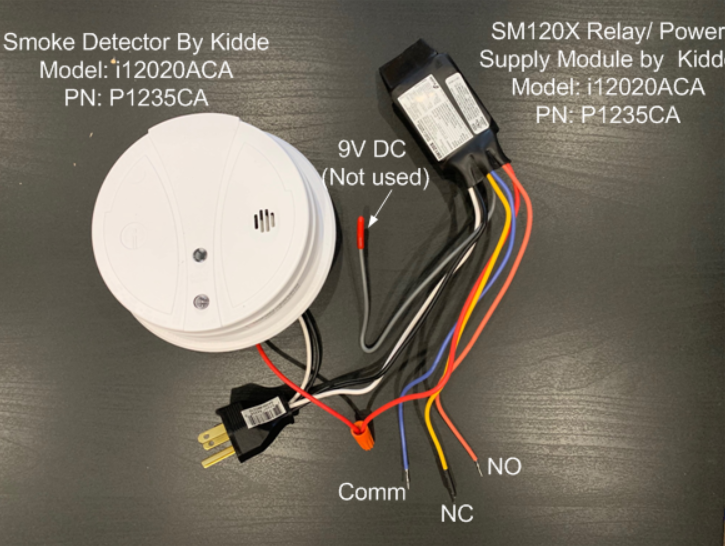
Testing the relay output
It is time to test if your settings are working correctly. To do this, press the test button on the sensor unit to trigger the sensor. If your Kidde relay module uses a mechanical relay, you should hear a click sound indicating the relay trip. For models with solid state relays, you wont be able to hear any sounds and may need a multimeter to test the relay action.
Connecting the relay output to Proteus RC
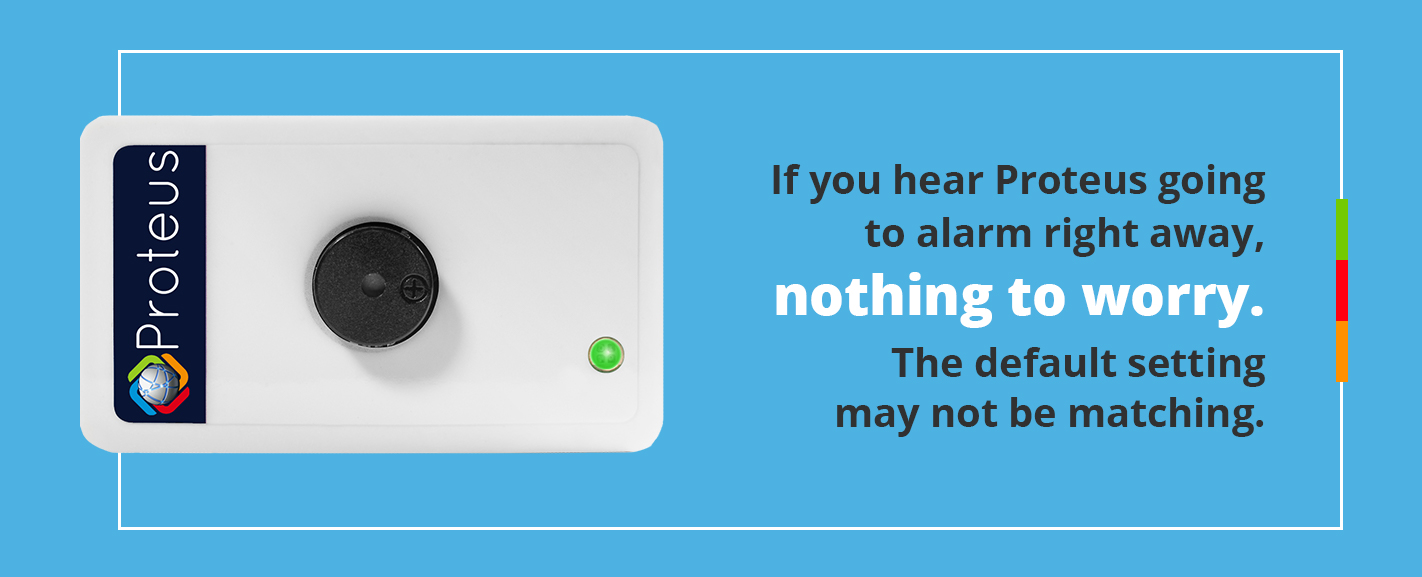
Now we can connect the relay output to Proteus RC. Proteus RC can be configured to monitor relays that are normally open or normally closed. This can be selected and adjusted by logging into the Proteus cloud account, on the settings tab of the sensor. During the process of connecting Kidde relay output to Proteus RC, if you hear Proteus going to alarm right away, nothing to worry. Just note that the default setting for Proteus may not be matching the normal state of Kidde relay terminals you have chosen. Just login to the Proteus cloud and make sure it is set to Normally closed, and save settings. It might take up to a minute Proteus RC to sync the changes you made on the cloud. So, please be patient during this syncing process. Once this is done, you can connect the COMM and normally closed terminals of Kidde relay relay output to Proteus RC terminal block input.
Testing the interface
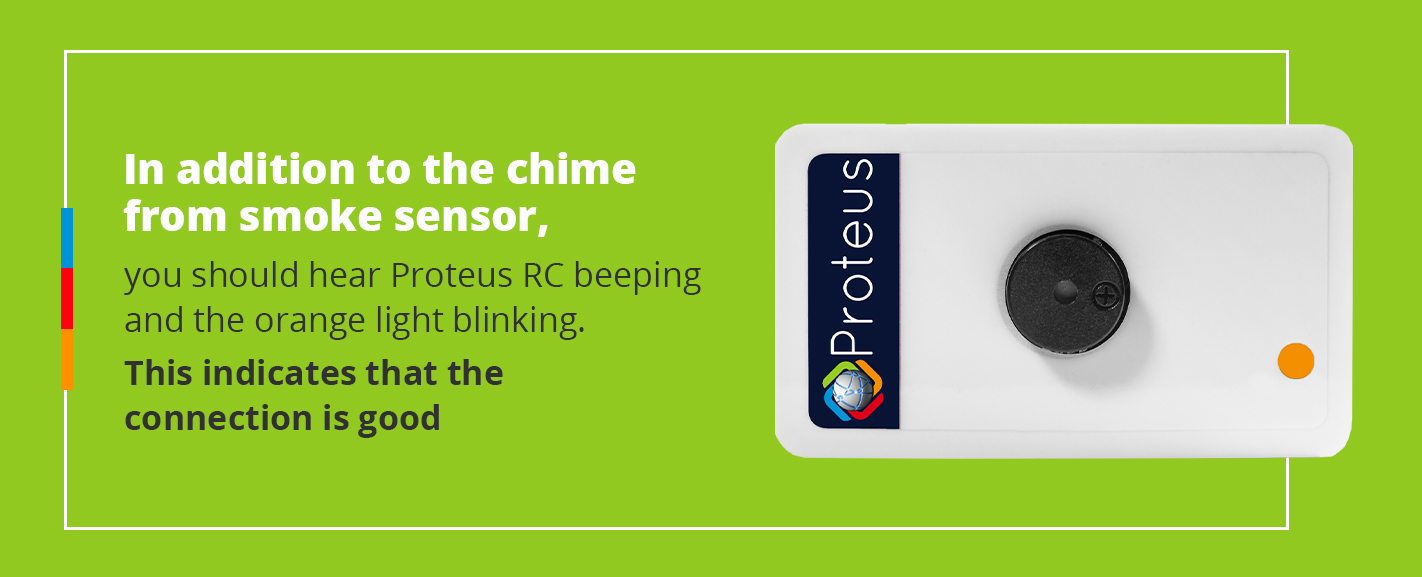
It’s time to test the interface. To do this, press the test button on the sensor unit to trigger the sensor. In addition to the chime from smoke sensor, you should hear Proteus RC beeping and the orange light blinking. This indicates that the connection is good. Wait for few seconds, and once the alarm is reset, Proteus RC will also go back to reset and the beeping will stop.
Setting up email, text and call alerts
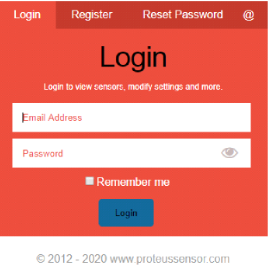
To set up notifications, login to proteushub.com and click on the settings tab of your sensor. Scroll down to notifications. Enter your emails, and phones (in the recommended format). Phones should be entered along with their carrier gateway info. To learn more on this, click on “How to get texts” button right below the email input field. Make sure you add a comma between each email/ phone. Once you have added all contacts, scroll all the way down and click save settings.
Proteus Cloud Login Page
Once logged in, you will be able to see your sensor. Click on the Settings tab.

Scroll through the options and make the changes you need.
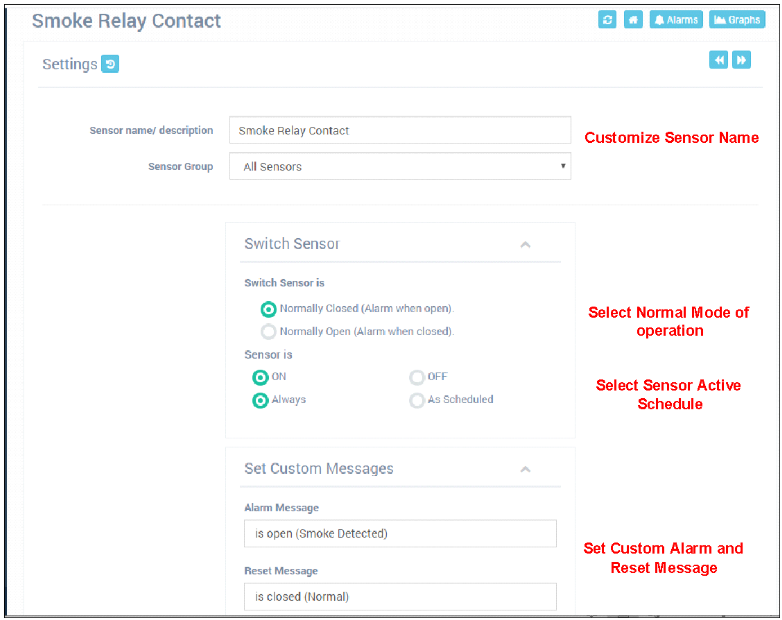
The Sensor Scheduler lets you decide whether you want the sensor to be active all the time, or you onely want it to notify you at specific times/ days. Etc. To enable this, click on “As Scheduled” button to view your choices.
Alarm Trip and Reset Delays
Proteus has options for custom delay settings. In the context of this document, here is a handy use of the delay settings.
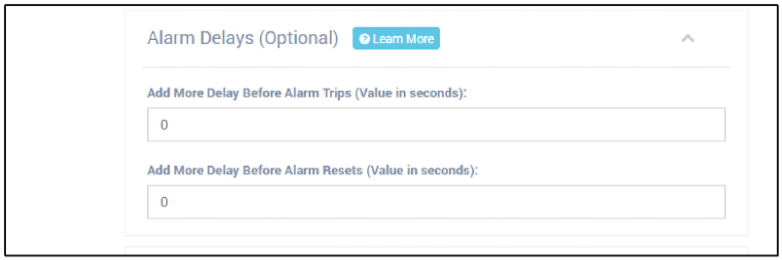
Say your sensor detected smoke in the garage. It tripped the alarm and you got alert messages by email and or text indicating the event. After the first alert, if you don’t want to get too many consecutive messages for a while, you can set the “Alarm Reset Delay” to 30 minutes (=1800 seconds) or 2 hours (=7200 seconds) or a value of your choice. This means that once you get the first alert, even when Kidde sensor goes back to normal and might trip another alarm in 5 minutes, Proteus will continue to remain in alarm mode for the duration of the delay settings. This will eliminate too many consecutive messages being sent to your email or phone.
Email/ Text / Call Notifications
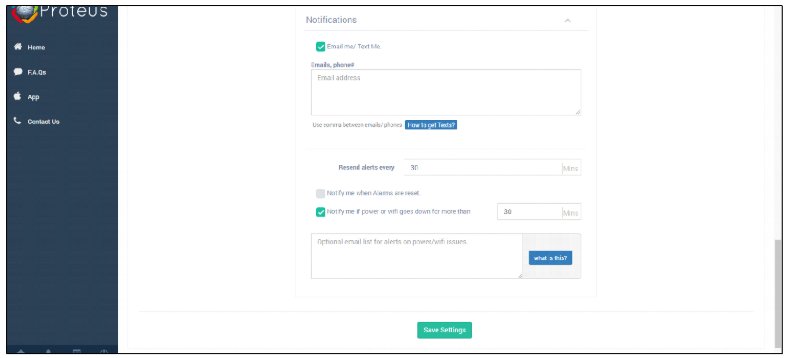
You can enter emails, and phone numbers in the notification section. Voice call alerts are available as a premium feature. Please see advanced mode options if you wish to enable this feature.
Alarm Resend Timer
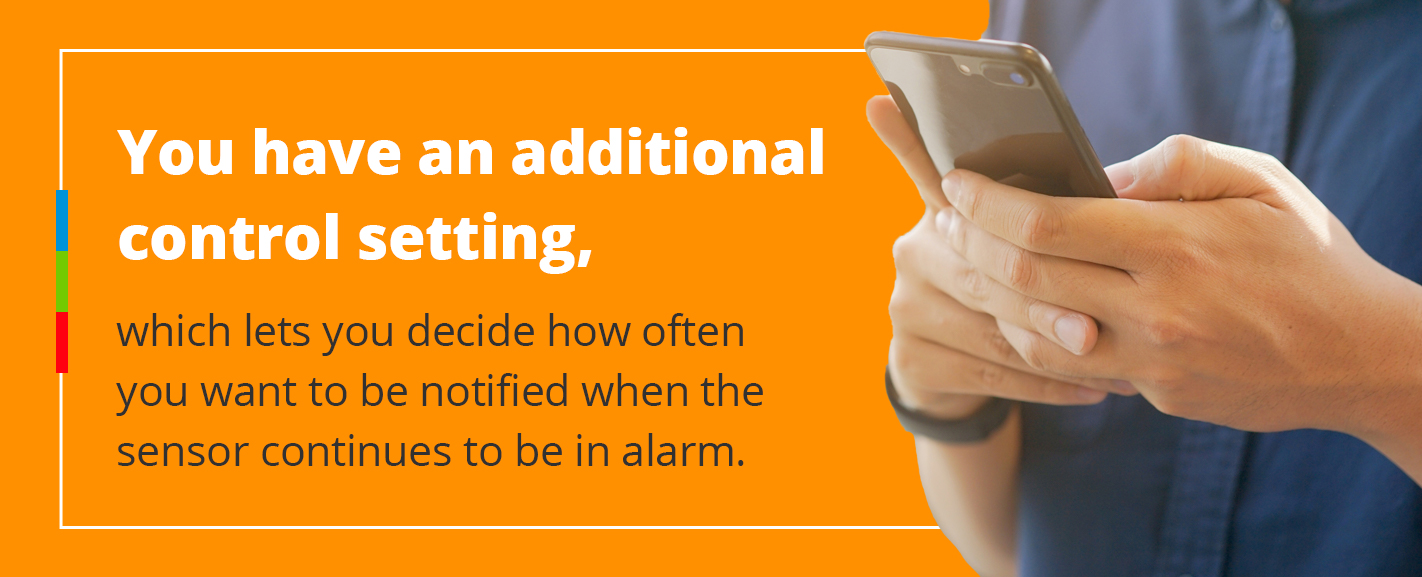
Note that earlier we mentioned adding alarm reset delay to avoid too many consecutive alerts? This means Proteus continues to be in alarm mode for that duration. You have an additional control setting which lets you decide how often you want to be notified when the sensor continues to be in alarm. By default, this is set to 30 minutes, but you can change it to a higher or lower value if desired.
Save Settings
After making all the necessary changes, remember to save the settings. You have successfully connected your driveway motion sensor to the cloud with email, text and optional call alerts.
Contact us with Questions
Got a question? Contact us at support@proteussensor.com or by filling out our contact form with your queries and we will get you the information you need right away.