We use cookies to make your experience better. To comply with the new e-Privacy directive, we need to ask for your consent to set the cookies. Learn more.
How to Connect Your Driveway Alarm to Get Email, Text or Call Notifications

There is no dearth of brilliant tech products available in the market today to solve your day-to-day problems. Some offer built-in cloud connectivity and alert capabilities, while many do not. In this day and age, getting notified on your smart phone or emails when things happen is a must have feature. For those devices that lack this feature, yet provide a normally open or normally close contact output interface, Proteus RC comes to your advantage. This document refers to interfacing 3rd party sensors and devices with relay contact output capability to the cloud using Proteus RC WiFi relay contact monitor . Proteus RC is a cloud connected relay contact monitor that can work with both normally open and normally closed contacts. When the status of the relay changes, it will send alerts via emails, text and voice calls. It can also trigger webhooks to achieve even more functionalities over the web. It should be noted that the relay contact output should be pure open/ close contacts with no voltage on the terminals.
In this example, we will cover the steps to connect a Guardline® Wireless Driveway Alarm Outdoor Weatherproof Motion Sensor & Detector® (a popular driveway alarm system available on Amazon.com) to Proteus RC relay contact monitor and get email and text alerts when the sensor is triggered.
Notes: Proteus Sensors is not affiliated or associated with Guardline® or any other 3rd party products or services mentioned in this document. Guardline, Amazon, IFTTT and any other trademarks are property of their respective owners. Guardline Images are courtesy setup user guide.
Basic Setup for Guardline and Proteus
For the sake of keeping this document simple and easy, we are not covering the setup process for Guardline Sensor as well as Proteus RC Sensor. Please follow the setup guides for these sensors and go through the steps as directed in their respective setup guides. For the scope of this document, it is not important which one you pick and setup first.
Enabling relay contact output for Guardline
Guardline has options available for a 12V relay controlled output as well as a NO/ NC (Normally Open/ Normally Closed) contact output. Based on the Guardline unit we tested, these two sections are independent. Meaning when Guardline sensor detects motion, the receiver unit
- Activates a relay, which makes 12V available on the contact.
- Activates a relay, which toggles the NO/NC contact without any DC or AC voltages.
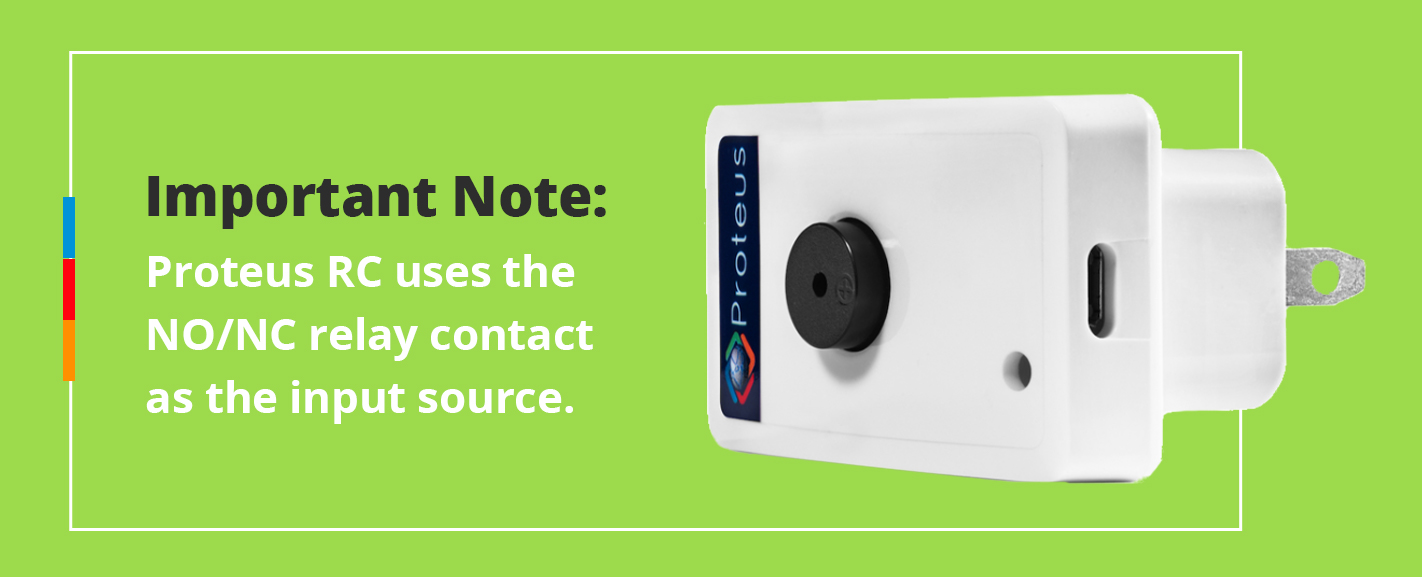
Important Note: Proteus RC uses the NO/NC relay contact as the input source. It is important to have no DC or AC voltages on the contacts for Proteus RC to work.
Toggle Switch Controls
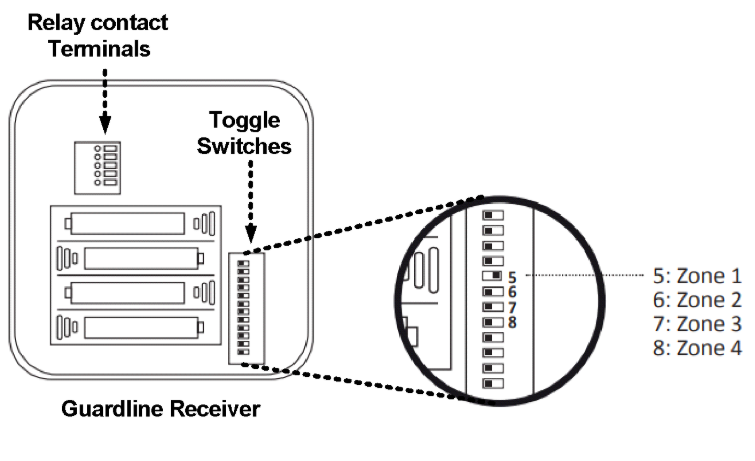
Guardline receiver offers four zones under which you can connect sensors, and there are toggle switches to select which zone of sensors you want to use to trigger the relay contact output. To enable the NO / NC contact, you need to select the zone toggle switches corresponding to your Guardline Sensors to enable which zones you wish to trigger the relay contact. To learn more about what zones are, how to select zones during setup of Guardline, etc please refer to the Guardline User guide.
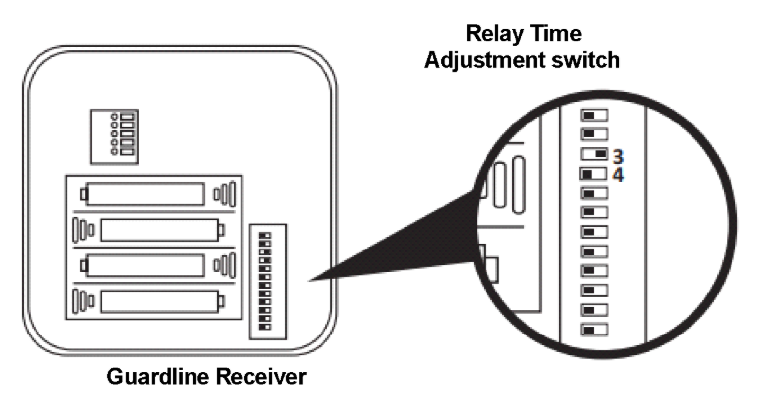
Guardline also offers control switches so we can decide how long the relay contacts remain on once the driveway sensor detects motion. This function is controlled by toggle switches #3 and #4. The options include 1 second, 5 second, 30 second and 60 second. We recommend setting atleast 5 seconds so the Proteus RC does not miss any events.
For the scope of this document, we have one Guardline driveway motion sensor connected under zone one of the receiver. We need to make the following changes to the toggle switches.
1. To enable sensors under zone one to trigger the relay contact output, turn the toggle switch# 5, and switch# 9 to to ON position. Keep in mind that if your set your guardline motion sensor to a different zone, you must match the receiver also to that zone.
2. To set 5 second delay for the relay contact, toggle switch#3 to the right, and switch#4 to the left.
Testing the relay output.
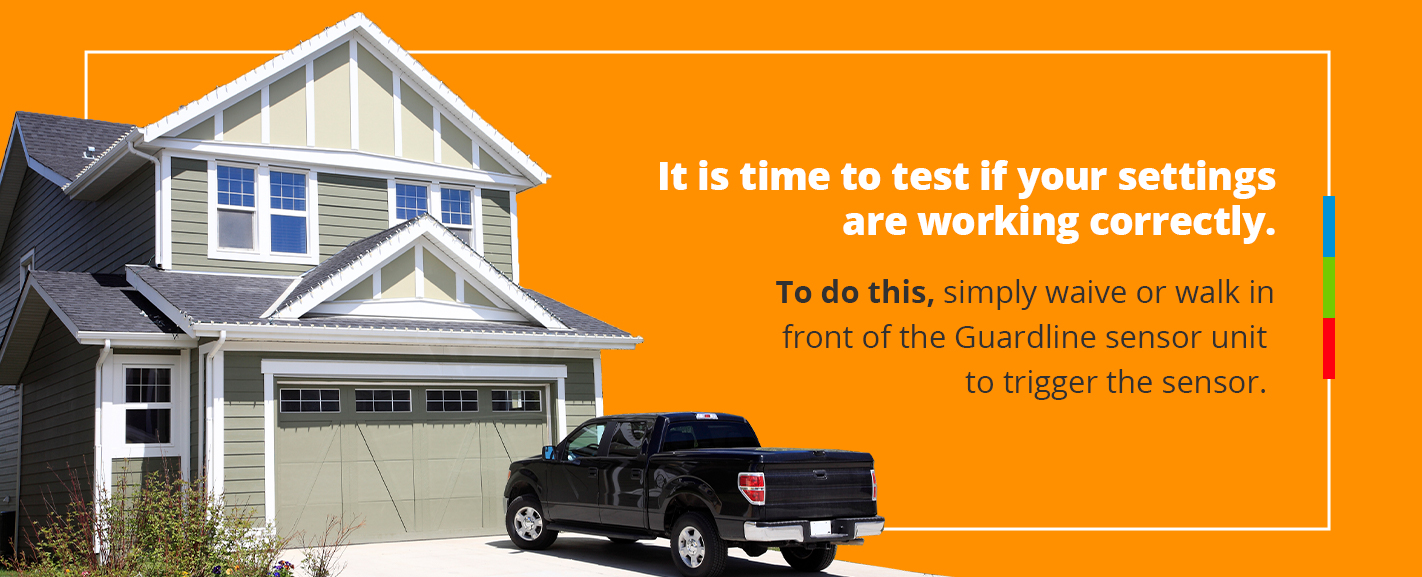
It is time to test if your settings are working correctly. To do this, simply waive or walk in front of the Guardline sensor unit (or press the test button inside the sensor unit) to trigger the sensor. Alongside the alarm chime, you should hear a clicking sound indicating the relay turing on. After 5 seconds you should another click indicating the relay turning off.
Connecting the relay output to Proteus RC.
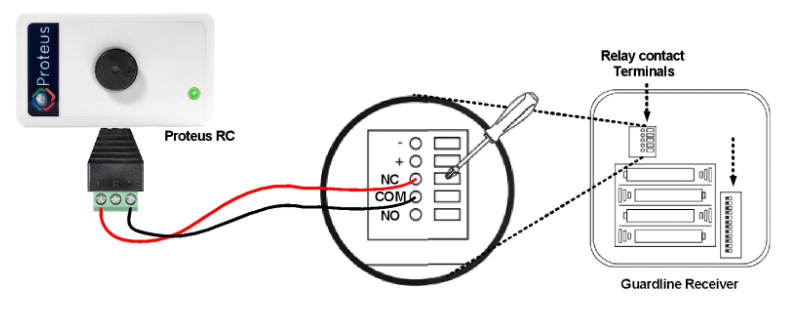
Now we can connect the relay output to Proteus RC. Proteus RC can be configured to monitor relays that are normally open or normally closed. This can be selected and adjusted by logging into the Proteus cloud account, on the settings tab of the sensor. During the process of connecting Guardline relay output to Proteus RC, if you hear Proteus going to alarm right away, nothing to worry. Just note that the default setting for Proteus may not be matching the normal state of Guardline. Just login to the Proteus cloud and make sure it is set to Normally closed, and save settings. It might take upto a minute Proteus RC to sync the changes you made on the cloud. So, please be patient during this syncing process. Once this is done, you can connect the COMM and normally closed terminals of Guardline receiver relay output to Proteus RC as showin below.
Notes: The contact wires are not carrying any significant current, so you can use standard 20 to 24 AWG wires to make the connection. There is also no reason to worry about the length of the cable you can use even up to couple hundred feet since this is a pure open/ close contact.
Testing the interface
It’s time to test the interface. To do this, waive or walk in front of the Guardline sensor unit (or press the test button inside the sensor unit) to trigger the sensor. In addition to the chime from Guardline receiver, you should hear Proteus RC beeping and the orange light blinking. This indicates that the connection is good. Wait for few seconds, and once the alarm is reset, Proteus RC will also go back to reset and the beeping will stop.
Setting up email, text and call alerts
To setup notifications, login to proteushub.com and click on settings tab of your sensor. Scroll down to notifications. Enter your emails, and phones (in the recommended format). Phones should be entered along with their carrier gateway info. To learn more on this, click on “How to get texts” button right below the email input field. Make sure you add a comma between each email/ phone. Once you have added all contacts, scroll all the way down and click save settings.
Proteus Cloud Login Page

Once logged in, you will be able to see your sensor. Click on Settings tab.

Scroll through the options and make the changes you need.
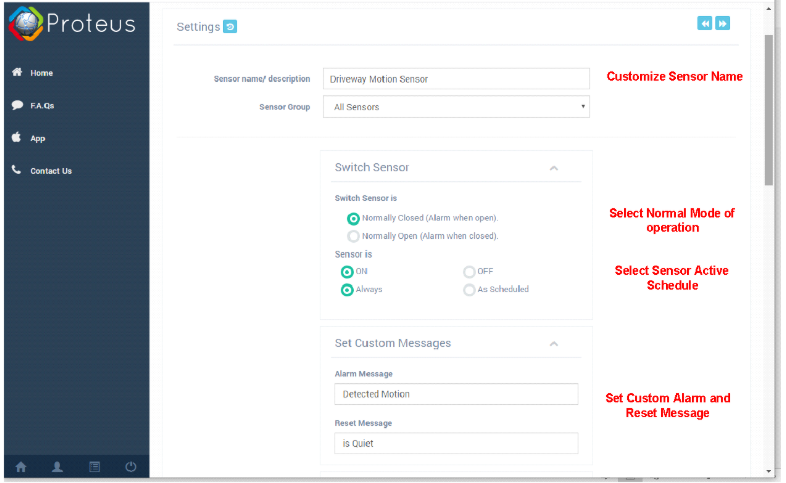
The Sensor Scheduler lets you decide whether you want the sensor to be active all the time, or you onely want it to notify you at specific times/ days. Etc. To enable this, click on “As Scheduled” button to view your choices.
Alarm Trip and Reset Delays.
In addition to the delay settings available on Guardline, Proteus has its own delay settings. In the context of this document, here is a handy use of the delay settings.

Say your sensor detected motion in the driveway. It tripped the alarm and you got alert messages by email and or text indicating the event. After the first alert, if you don’t want to get too many consecutive messages for a while, you can set the “Alarm Reset Delay” to 30 minutes (=1800 seconds) or 2 hours (=7200 seconds) or a value of your choice. This means that once you get the first alert, even when guardline goes back to normal and might trip another alarm in 20 seconds due to someone walking in the driveway, Proteus will continue to remain in alarm mode for the duration of the delay settings. This will eliminate too many consecutive messages being sent to your email or phone.
Email/ Text / Call Notifications
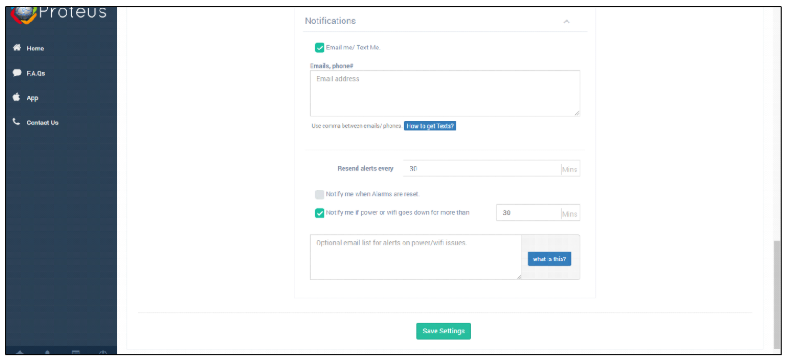
You can enter emails, and phone numbers in the notification section. Voice call alerts are available as a premium feature. Please see advanced mode options if you wish to enable this feature.
Alarm Resend Timer
Note that earlier we mentioned adding alarm reset delay to avoid too many consecutive alerts? This means Proteus continues to be in alarm mode for that duration. You have an additional control setting which lets you decide how often you want to be notified when the sensor continues to be in alarm. By default, this is set to 30 minutes, but you can change it to a higher or lower value if desired.
Save Settings
After making all the necessary changes, remember to save the settings. You have successfully connected your driveway motion sensor to the cloud with email, text and optional call alerts.
Contact us with Questions
Got a question? Contact us at support@proteussensor.com with your queries and we will get you the information you need right away.


